
Disclosure: Some the links in this article are affiliate links, meaning, at no additional cost to you, I will earn a commission if you click through and make a purchase. We ONLY participate in affiliate programs for products we use and recommend.
Backing up your WordPress website is one of the most important things you can do and one of the most overlooked. It’s also one of the easiest and affordable ways to protect your business.
In order to have a great website you’ve spent a lot of time, a lot of money or in many cases, a lot of both.
How would you feel if you lost your website? I don’t just mean a glitch with a plugin or a post you forgot to save. I mean everything, all of your content that you have been adding over the years, gone.

For most, it would be devastating. In many cases it would not only cost you money to rebuild your site but could cost you new business. What is that worth?
You need to take backups for your WordPress site very seriously.
No matter how big a site is or how secure, every website is vulnerable. Websites get hacked, servers crash and users and developers will make mistakes. There are any number of scenarios that put your website at risk. The best way to protect your business online is to backup your site.
So how difficult is it to set up a backup?
Not difficult at all. It’s easy and will take less than 20 minutes to set up.
I’m going to show you how easy it is to set up your WordPress website backup using the free WordPress plugin UpdraftPlus.
Creating Your WordPress Backup with UpdraftPlus
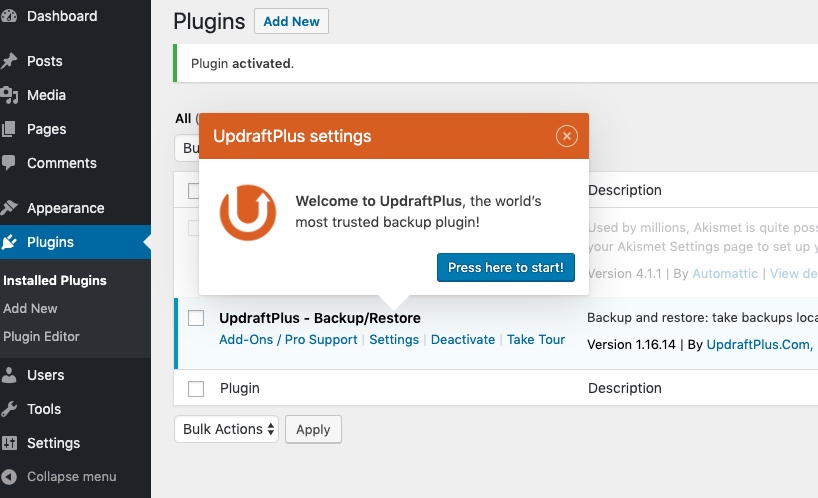
1. Download and Install UpdraftPlus.
Like any other plugin in WordPress you can search the plugin from your admin panel, install the plugin and then activate it.

2. Configure the UpdraftPlus Plugin
Once activated, UpdraftPlus will take you through the setup process. Start by clicking the ‘Press here to start!’ button.
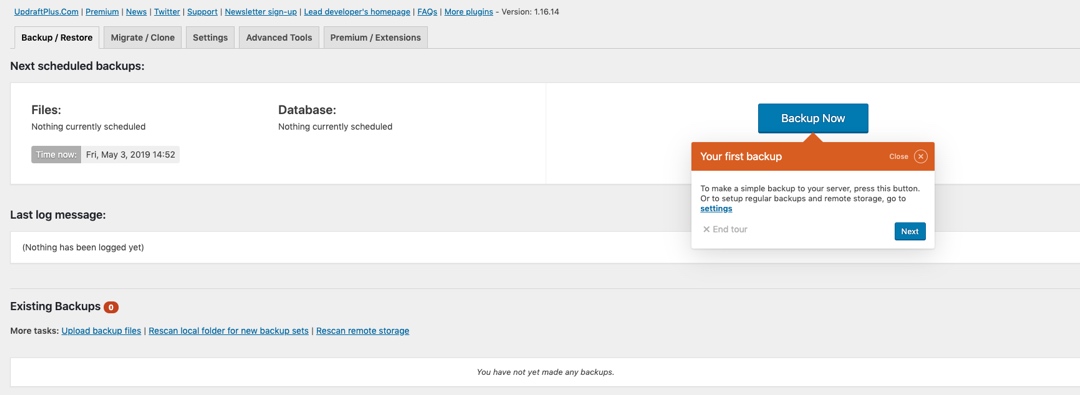
3. Complete your first backup
Click on the ‘Backup Now’ button. This will create a backup file on your hosting server.
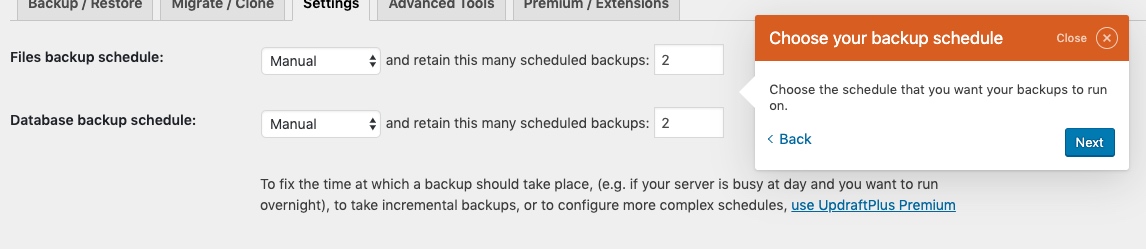
4. Set up your Backup Schedule
It is critical to have regularly scheduled backups. Here you can choose the frequency of backups. I would recommend backing up at least weekly. If you are adding a lot of content each day they you may want to consider backing up more frequently. You also don’t want to retain too many backups on the hosting server. This can have a negative impact on your site speed and may cost you more money for space in your hosting account.
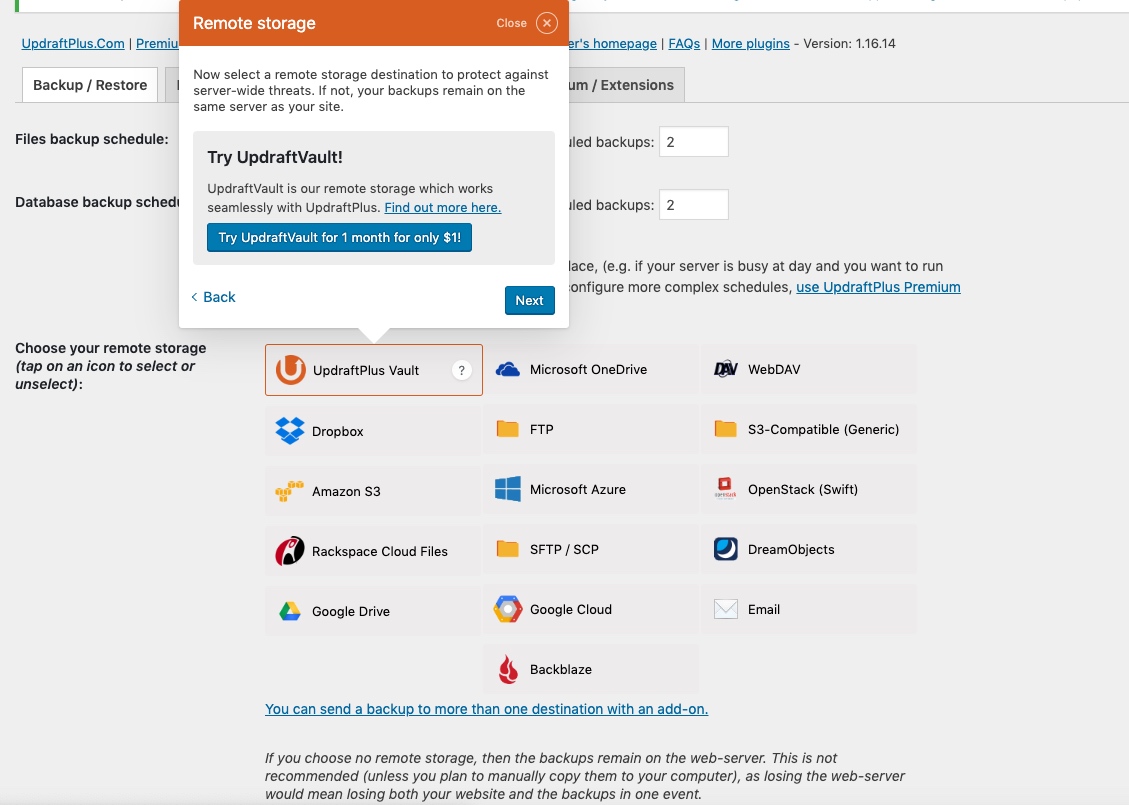
5. Create an Offsite Backup
When updraft creates your backup it stores that backup on your server. This is a good start but servers crash and all of your hosted content could be at risk. This is why it’s important to set up offsite backups. You can sign up for the UpdraftVault or use a service like Dropbox, Amazon S3 or Google Drive. For a single site, a Dropbox account or Google Drive are great FREE options. For multiple sites I would recommend the UpdraftVault or Amazon S3. All of our hosting clients at Stark Web Design are backed up weekly on an Amazon S3 account.
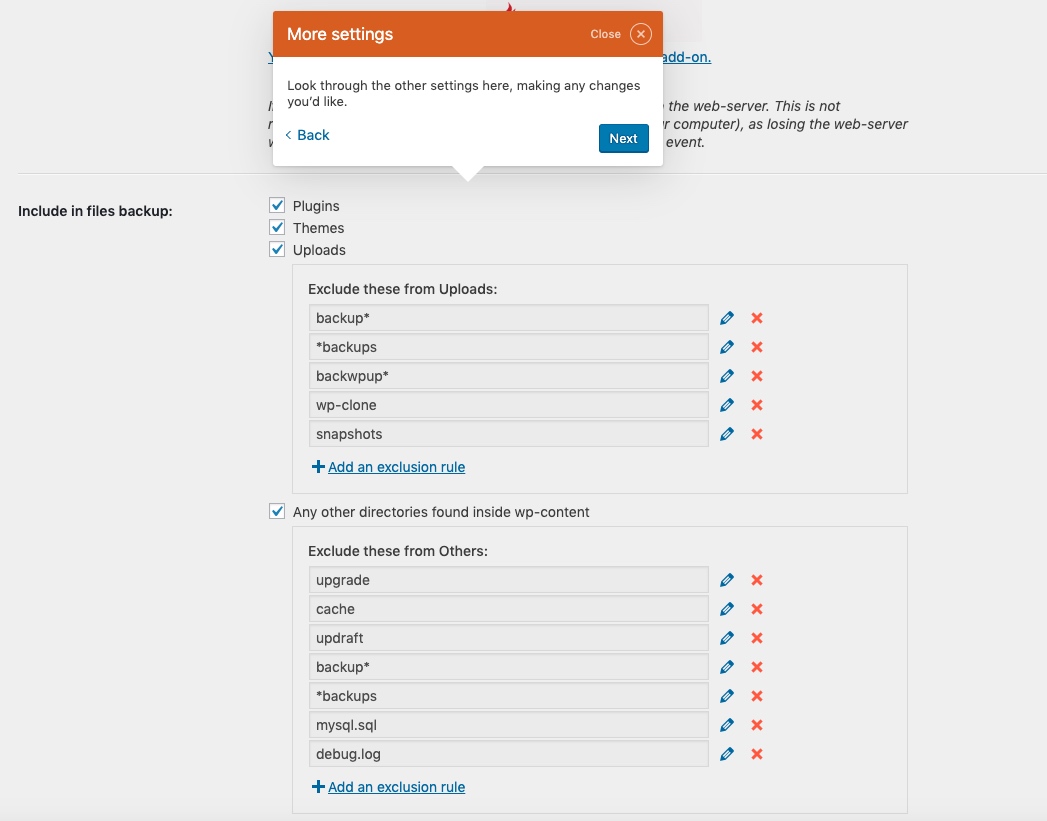
6. Configure additional backup settings.
After choosing your offsite backup settings. You will have an opportunity to choose what portions of your website that you want to backup. By default, your entire site is backed up. There is no need to make changes to these settings but you can exclude certain files from your backup if necessary.
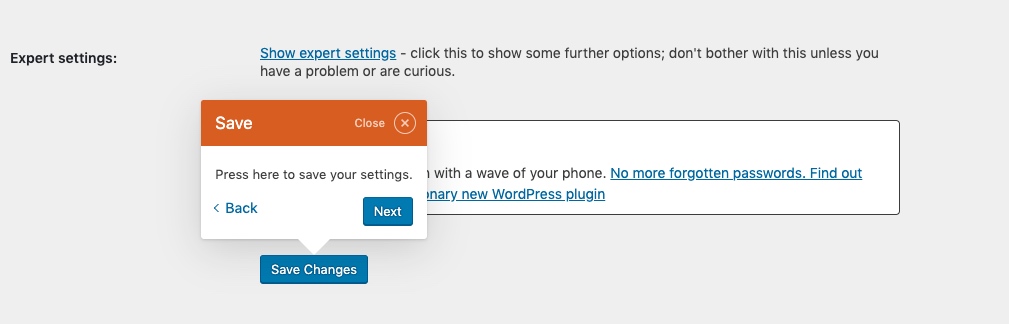
7. Save Settings
Click on the ‘Save Settings’ button and your site is ready for to start creating regularly scheduled backups.
Restoring Your WordPress Backup with UpdraftPlus
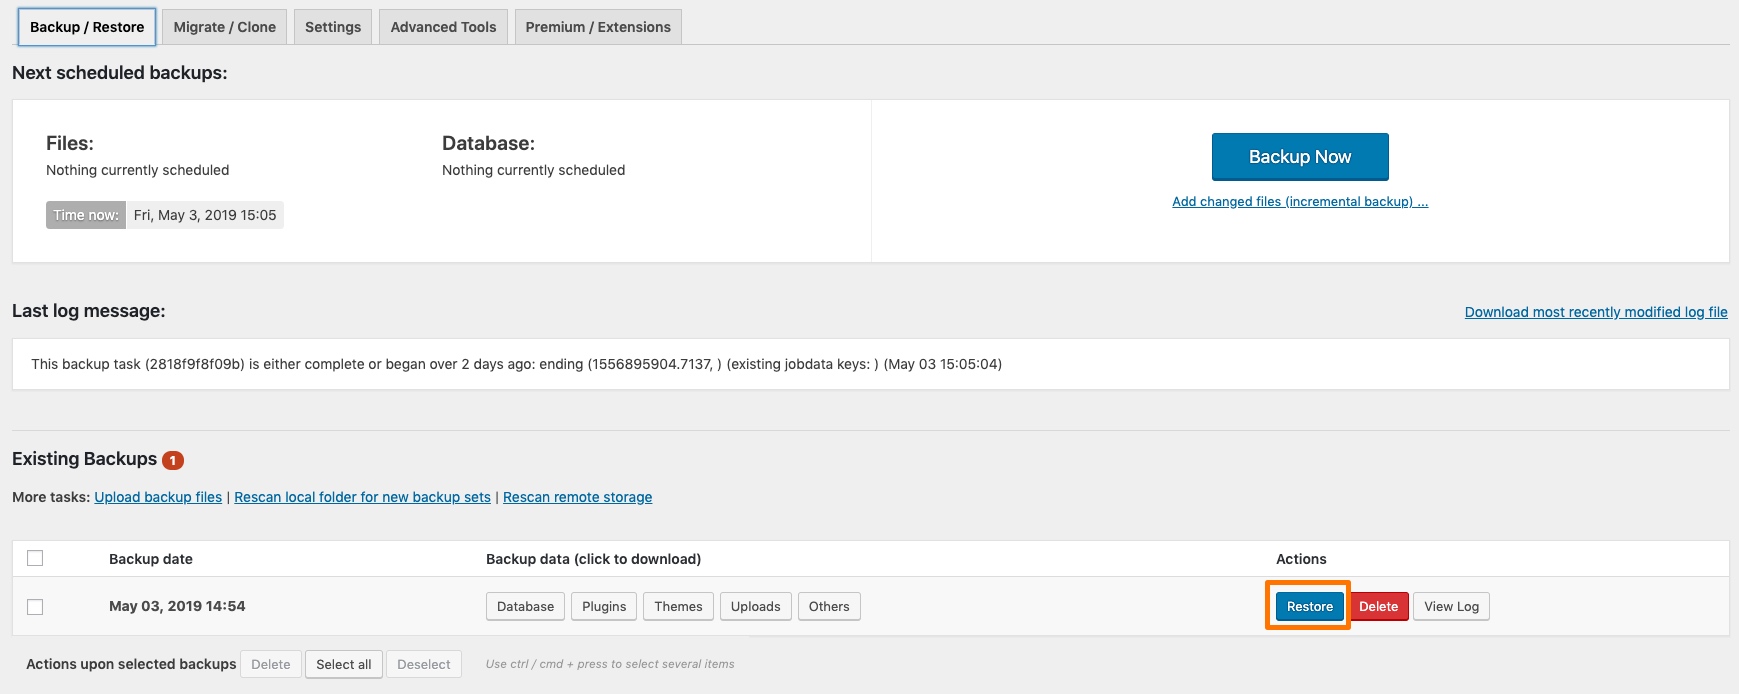
1. Choose the Backup you wish to restore
From the ‘Backup/Restore’ tab, scroll down to the Existing Backups section. Choose the Backup date you wish to restore and click the ‘Restore’ button.
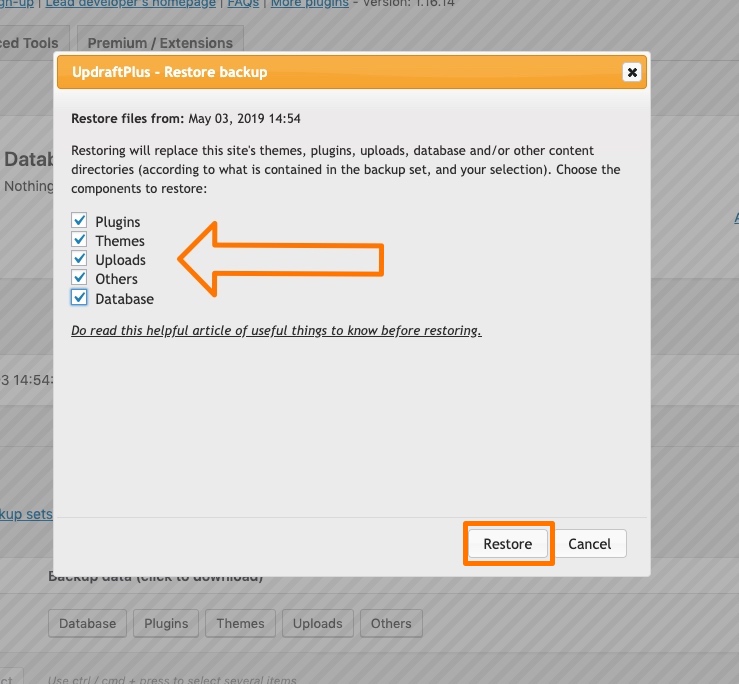
2. Choose files to restore
After clicking the ‘Restore’ button, a window will open to choose the files that you want to restore. You can choose from Plugins, Themes, Uploads, Others, Database. If you choose all it will restore the entire WordPress site. Once you choose the files then click the ‘Restore’ button.
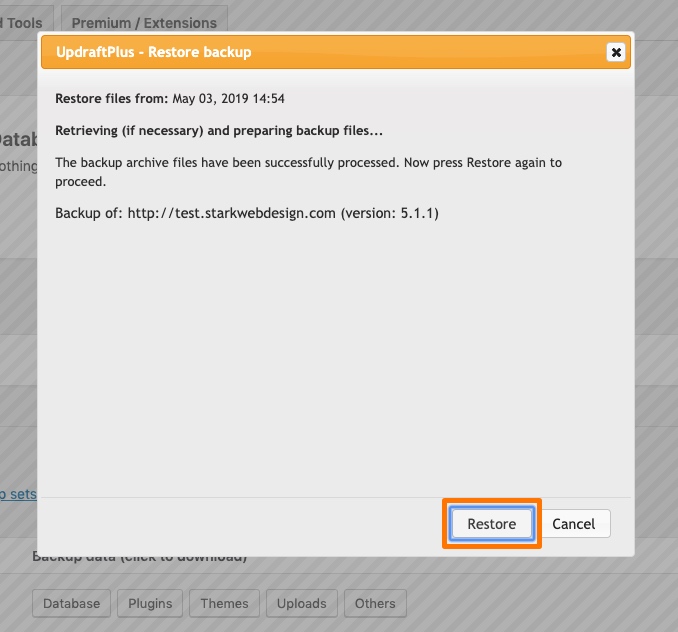
After you click the ‘Restore’ button, UpdraftPlus will retrieve the files. Once this is done you will get a message that the “archive files have been successfully processed”. Then you will be prompted to click the ‘Restore’ button again.
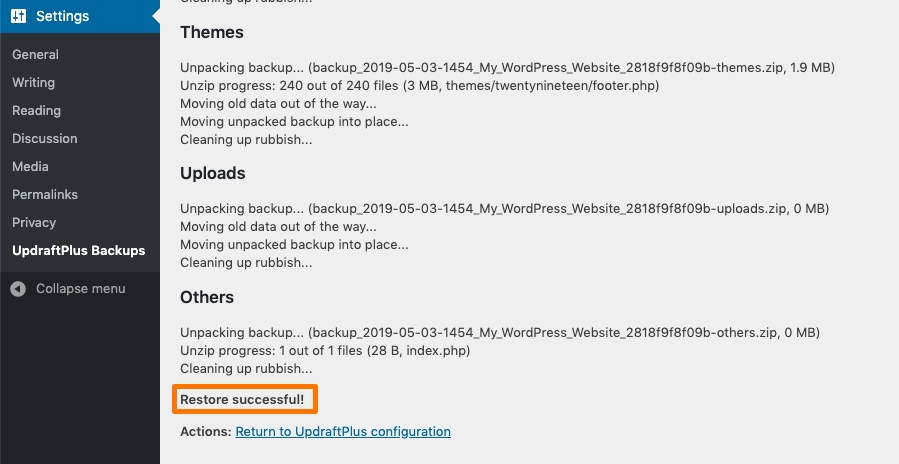
3. Restore successful
Look for the “Restore Successful” message and your site has been restored.
Why Use UpdraftPlus
UpdraftPlus is one of the most powerful WordPress backup plugins. It’s also FREE.
It’s a great option for small businesses because it allows you flexibility to choose your backup schedule as well as choose your offsite backup location.
As you can see from the steps above UpdraftPlus is an easy-to-use backup plugin that will keep your site from being lost. However, backup software is not the only line of protection you should consider for your website.
To keep your site secure be sure to visit our post on site security. 5 Simple Tips for Better WordPress Website Security
I hope you found value with this post. If you did please like, comment and share.
To Your Success,

Steve Stark
Email me at steve@starkwebdesign.com
Follow me on Twitter
Find me on Instagram